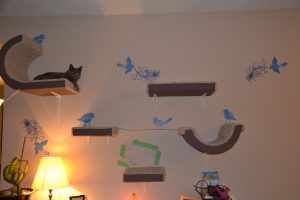
Stenciling for cats
It’s been a while since I last posted, but I figure it’s about time to get back at it! In the vein of my Renovator’s Wife posts, I want to show how easy stenciling is and how it can transform a room. Now, to be fair, I live in “the mother of ugly” house, so I can experiment all I want without much concern, but, I want to remind you that stenciling is just paint – there are few things as easy to cover up as a bad paint job!
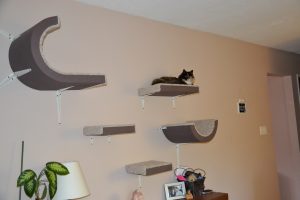
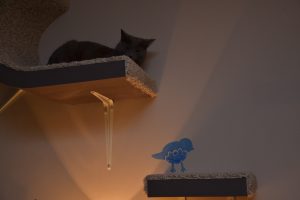
In the summer – I should have done a post about this – I made Avi (our 13 year old cat) some cat shelves. She loves them, but I knew the wall needed a little bit of ooph. It’s so boring.
Then, after a post I’d done for another site about stenciling, Royal Design Studio Stencils contacted me to see if I had other projects in the works. The cat wall was the ideal task to take on.
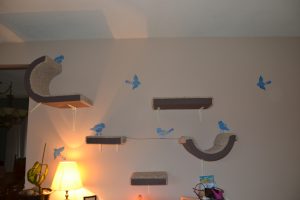
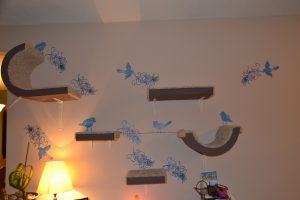
I selected some bird and feather stencils, which Royal graciously supplied to me and I’m very thankful for. It had been a long time since I’d done any stencil work, so I knew it would be a challenge, but once I started, I remembered how easy stenciling actually is.
Pick your stencil [I used Sweet Tweets B and the Grande Peacock Feather], pick your paint (just about any paint will do, although Royal also sells paint and other supplies on their site, I used some of those bottles of cream latex paint from the craft store) and get a “pouncing” brush – kind of goes nicely with the cat theme, yes? Fortunately, I still had some old brushes so I was set.
I determined where I wanted the stencils to go and flew at it. I recommend using a re-positionable adhesive if you want crisp lines on your stenciling. I wanted a fuzzy, grainy, amateurish look, so just went with masking tape to hold the stencils in place.
Load your brush with paint,but then offload most of it onto a rag, paper towel or other surface (otherwise you’ll get bleeding of paint under the stencil – again, I left more paint on my brush to create this look, but crisp line require minimal paint). This is all basic stenciling 101 so forgive me if you’re bored at this point! What I did differently was selected a pallet of about 5 colours that I wanted for the birds and 5 different colours, within the same basic colour family, for the feathers. I’d load my brush with one or two colours and off load it, then start the “pouncing” which is just pushing the paint onto the wall with the end of the brush. I like to hold the brush in my fist with the brush end out the pinky side and go at the wall like I’m hitting it with the side of my hand, lightly and repeatedly.
Then, I’d go over some of the paint with other colours to create a multi-colour look with each use of the stencil.
What I liked about Royal’s stencils was the fact that I could put them in the sink under hot water without damaging them at all. That way I didn’t have to worry about paint from a previous use making a mess of the wall, so I washed and dried the stencil between each application.
I started with the bird stencil, then added the feather stencil to create an over-all look for the wall. Avi has been joined by a new cat (JaneJane) and while that relationship isn’t exactly blossoming, both cats seem to enjoy the shelves – albeit at different times.
Stenciling is easy and it’s a great way to personalize a space without a lot of time or money invested. And, if you hate it? Just paint over it!

Ronda Payne
A writer since she first held a pen, Ronda Payne – aka: the Girl with a Pen, is passionate about words. In 2007, she kissed ‘real jobs’ goodbye and began her true career as a copywriter, non-fiction freelance writer (magazines and other periodicals) and creative writer.
