The Door to a Better Home
Sorry the alignment of this post is pretty wonky – not sure what’s happening with the photos!
Popular for years, painting the front door of your home is an affordable, relatively easy, way to give your house some added flair. Green, black, red – there is no ‘bad’ colour anymore, so long as it goes with the overall look and style of your home. With the ‘for sale’ sign now on our lawn, this past weekend was the time for a few revisions to our front door to create a more welcoming appearance.
We purchased a beautiful new door glass from a friend in the business.
Mr. Do it yourself (my dad) and The Renovator installed it. My task was painting it with the exterior trim paint.
Prior to painting, The Renovator also took care of removing the old storm door. Storm doors are handy in the summer – but they don’t do you any favours when you’re selling and trying to create curb appeal!
Our door is metal with heritage style panels (orignally 4 panels, but the upper two were cut out when the new window went in). The paint had been flaking off for years, so step one for me was to remove the loose bits of paint and sand the door to create a paintable surface.

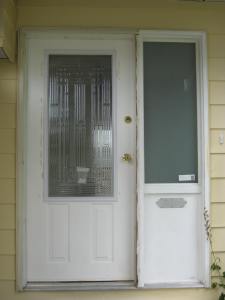
it’s hard to see the boring front door, but it was

with window, prior to painting
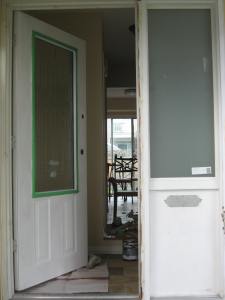
I taped off the new window and the knob and lock so that I wouldn’t scratch or damage any surfaces when I was sanding.

Window & details taped off
Once taped off, I started to peel away at the loose paint. Turns out it was all loose! I realized it was best to scrape the entire door. What a time-consuming mess! With bits of white paint flying (I still find a bit here and there in the house) I managed to strip, then lightly sand the entire door with a 120 grit sand paper. At the Renovator’s suggestion, I removed the knob and lockset as the scraping was a rather aggressive process!

Once the old paint was removed, I washed the door with TSP, let it dry, applied a coat of primer to ensure the new paint would stay put, then applied the first coat of the brick-coloured outdoor trim paint. You can tell even from this first coat, it’s going to look great!
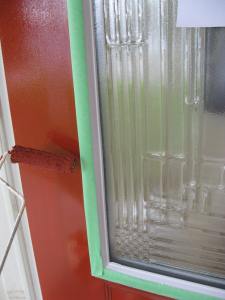
The second and third coats were done with a mini roller to give a consistent, even finish with a bit of texture to help hide the dents and marks in the door.

 roller coat

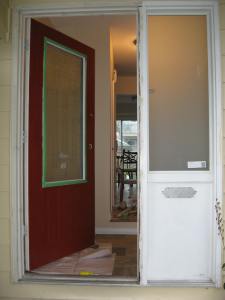
after third coat – waiting for it to dry
We let it dry for about 6 hours after the third coat – you want to be sure it is completely dry before closing it. Once I was certain it was dry, I attached the knob and lockset and sat back to admire my work!

removed tape, did touch ups
Upon inspection, The Renovator couldn’t help but compliment me! And that’s why I love being The Renovator’s Wife.

Wow – what a difference!

Ronda Payne
A writer since she first held a pen, Ronda Payne – aka: the Girl with a Pen, is passionate about words. In 2007, she kissed ‘real jobs’ goodbye and began her true career as a copywriter, non-fiction freelance writer (magazines and other periodicals) and creative writer.
The door looks awesome! I am about to paint our front door and was wondering what you use to scrape off the old paint.
Thanks for the question Cindy! We’re thrilled with how the door looks, so glad you agree! I recommend a metal putty knife to do the scraping. The metal ones are sharper and can get the old paint off better, but be careful not to scratch the door itself. I had a few places where I went through the ‘factory’ paint coat because I was being too agressive – you want to try to avoid this. Remember, you’re just removing paint that will come off on it’s own. If you can scrape it off easily, keep going. If it’s really stuck down, just primer over it. Send pictures of how you do!