Baby, it's Hot in Here!
How to Install a Programmable Thermostat
Programmable thermostats are great. They remember to save energy (and money!) even when we don’t. For the most part, after they are installed, you program them and leave them, changing the batteries as needed. When we moved in to ‘the mother of ugly’, I was pleased that there was a programmable thermostat. I adjusted it to suit our needs and forgot about it. Then one night, when I couldn’t sleep, I noticed the heater kicking in at 3:00 am. No wonder I couldn’t sleep! I was way too hot!
After trying everything, short of smashing it with a nearby heavy object, I returned to bed and commented to The Renovator (who wasn’t having difficulties sleeping) that I’d pick up a new thermostat. Off to Rona for the almost-cheapest programmable model available – I think it was $26. Not bad considering it will save us that much and more in the long run.
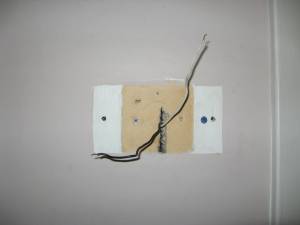
I considered my approach. After staring the old thermostat down and letting it know who was boss, I ended up bashing it off the wall because I couldn’t find the clips that swung the front panel off the back panel. I found the task of removing the back panel somewhat easier – that at least used screws and I know how to deal with those.
The vision before me, was this:
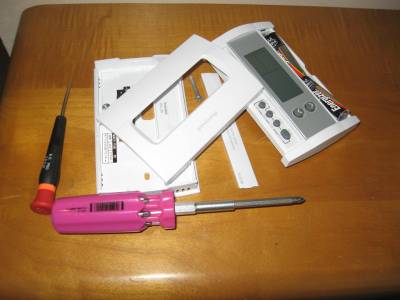
Next, I assembled my tools (just a multi-bit screwdriver – yes, it’s pink, it keeps The Renovator from taking it! I never needed the little one) while surveying the carnage of the old thermostat.
Then, I admired the child-proof packaging of the new thermostat. At last, with my heavy-duty kitchen shears, I had the new thermostat, included batteries and instructions before me. Of course I discarded the instructions immediately (The Renovator is so proud) and began installing.
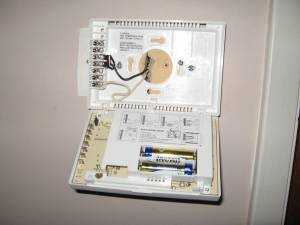
Not wanting to destroy the ‘incoming’ thermostat as I had the ‘outgoing’, I spent an inordinate amount of time trying to find the tabs to swing the front of the device from the back panel. The tabs were cleverly disguised as bits of white plastic that matched the rest of the unit.
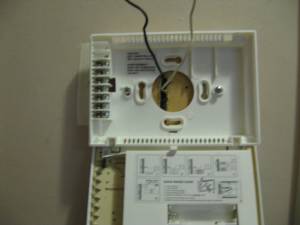
Once the tabs are pushed in, the back panel swings easily. I took the new thermostat and positioned it on the wall to see if any of the multitude of screw holes would line up with this model – Voila!
If you lack the numerous old holes like I had, you will need to mark placement for the screw slots of the back panel onto the wall, pre-drill for wall plugs and install the wall plugs (unless you hit a stud and don’t need plugs), in order to put the screws in.
Because I had been thrown off a bathroom cabinet by electrical current while installing a light fixture in house #1, I tend to be very respectful of electricity. That being said, the voltage going to your thermostat is minimal, not enough to cause harm, but I still don’t let the wires touch – I’m just cautious like that.
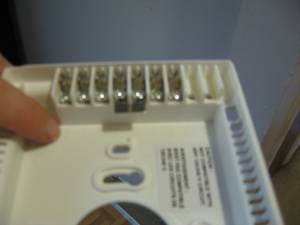
In our case, I was lucky to be dealing with a two-wire heating control. If you have more than two wires, definitely keep the instructions! Once mounted to the wall, I attached the wires to their appropriate terminals. The terminals will be marked on the thermostat. You’ll also find a diagram in your instructions of how to connect your system if you don’t have the simple 2-wire one I was dealing with. It’s always a great idea to mark the wires, as you disconnect them, with the terminal ID from the old thermostat using a bit of masking tape. It makes it much easier to figure out the terminals on the new one.
The heating relay wire is generally white, so this one is easy – attach it to the terminal labelled ‘W’ (for white! They’re so clever). Attach the wires, by loosening the terminal screws 1/2 way, then insert the exposed portion of wire under the screw and tighten it back up. The black wire is then connected to ‘RH’ terminal.
In many newer thermostats, there is a small part called a ‘jumper’. The jumper looks a bit like a tiny car fuse and is necessary to define whether you have a gas / oil or electric furnace. We have a gas furnace, so I left the jumper in the ‘HG’ position. For an electric furnace, I would have removed the small black block and pushed it into the position noted for ‘HE’.
Now, simply close the cover, and open the smaller front panel to program your thermostat! If you’ve managed the installation, programming should be a breeze for you; but just in case, keep those instructions on hand!
Is that the final step? No – there is one more very important step before you go pour a glass of wine and congratulate yourself . You must test the system to make sure it is working.
I waited until the next morning (when the house was the coolest) and manually adjusted the temperature setting to higher than the current house temperature on the display.
After a few anxious moments, the furnace kicked in! Just another reason I love being The Renovator’s wife.

Ronda Payne
A writer since she first held a pen, Ronda Payne – aka: the Girl with a Pen, is passionate about words. In 2007, she kissed ‘real jobs’ goodbye and began her true career as a copywriter, non-fiction freelance writer (magazines and other periodicals) and creative writer.
